Crispy Nashville Hot Chicken Sandwiches

This sandwich has that deep, fiery heat with a crispy crust and cool creamy slaw that makes every single bite delicious. It’s simple to pull together with everyday ingredients and the whole thing is on the table in under 40 minutes once the chicken has brined.

Crispy Nashville Hot Chicken Sandwiches

Why You'll Love This Recipe

I started making these when I got tired of driving across town for a sandwich I could make better at home. The buttermilk brine is all you need to keep the chicken juicy and tender under that crispy coating, and the hot oil glaze takes about two minutes to throw together and tastes incredible. The slaw is simple and cool and does exactly what it needs to do against all that heat.

Ingredients

Chicken and Brine

  • 4 boneless skinless chicken thighs
  • 1 cup buttermilk
  • 1 tsp salt
  • 1/2 tsp black pepper

Coating and Glaze

  • 2 cups all-purpose flour
  • 1 tsp garlic powder
  • 1 tsp paprika
  • 1 tsp salt
  • 1/2 cup hot frying oil, reserved from cooking
  • 2 tbsp cayenne pepper (reduce to 1 tsp for mild)
  • 1 tbsp light brown sugar
  • 1 tsp smoked paprika

Slaw and Assembly

  • 3 cups green cabbage, thinly shredded
  • 1 large carrot, grated
  • 3 tbsp mayonnaise
  • 1 tbsp apple cider vinegar
  • 1 tsp white sugar
  • salt and pepper to taste
  • 4 brioche or potato buns
  • dill pickle slices
  • mayonnaise
  • neutral oil for frying

Instructions

1. Brine the Chicken

Whisk the buttermilk, salt, and pepper together in a bowl and submerge the chicken thighs completely. Cover and refrigerate for at least 2 hours, or up to overnight. The buttermilk tenderizes the meat so it stays juicy all the way through the fry.

2. Make the Slaw

Toss the shredded cabbage and grated carrot together in a bowl. Whisk the mayonnaise, apple cider vinegar, sugar, salt, and pepper together, pour it over the vegetables, and toss to coat. Cover and refrigerate until you are ready to assemble. Even 20 minutes in the fridge makes a noticeable difference to the texture and flavor.

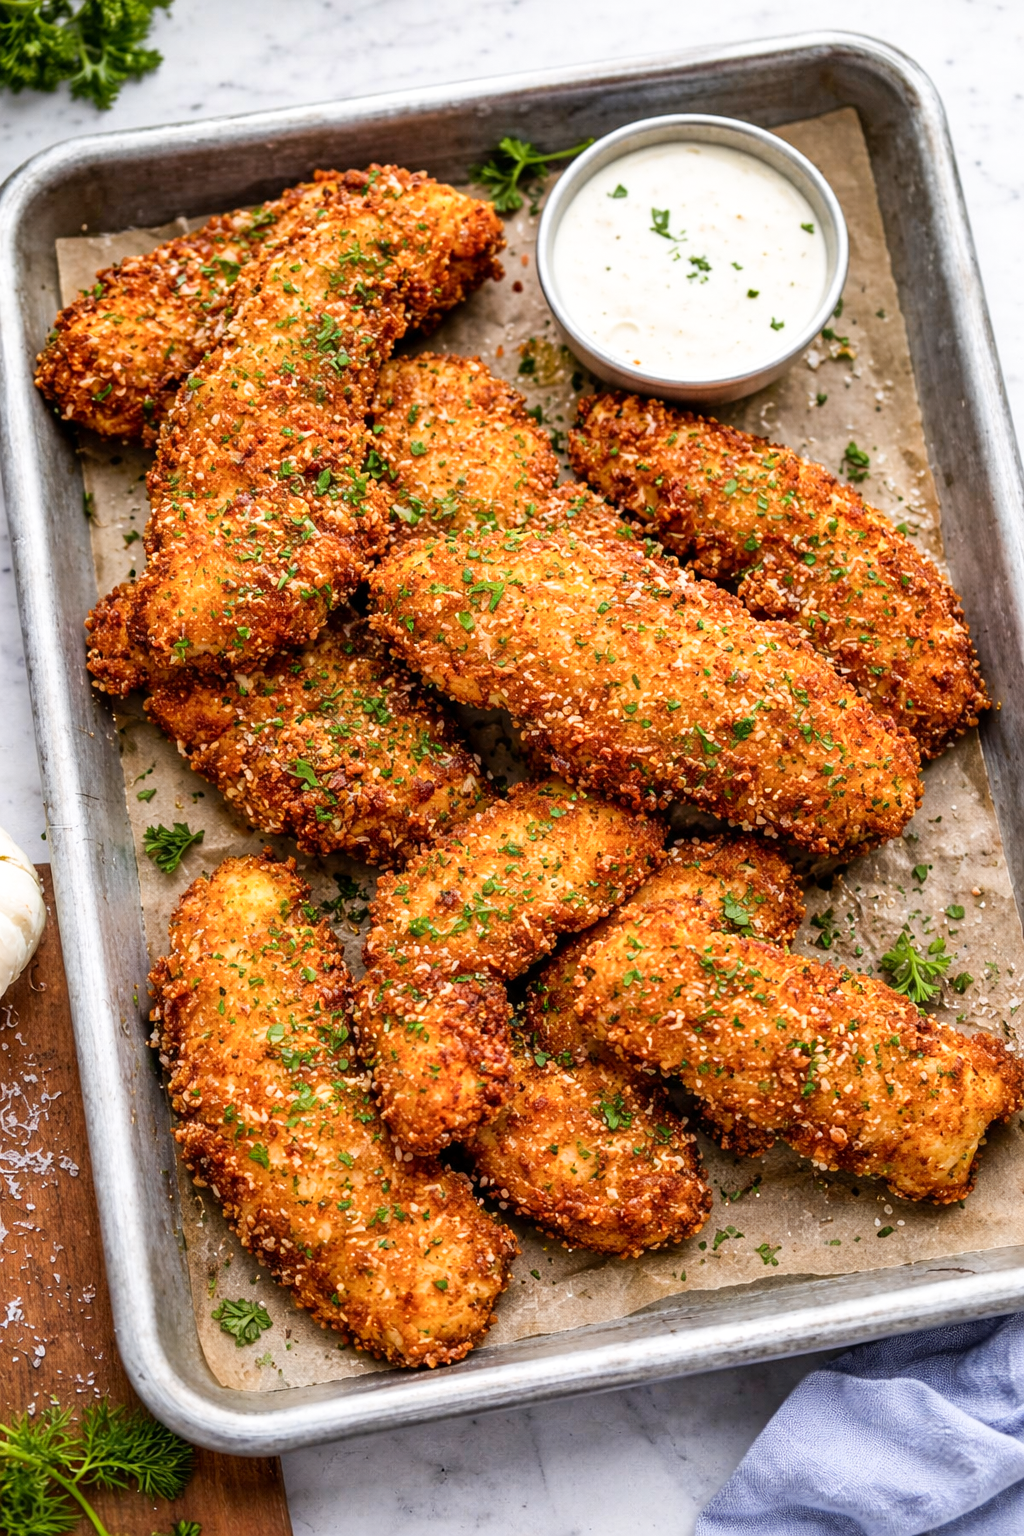
3. Dredge the Chicken

Whisk together the flour, garlic powder, paprika, and salt in a wide shallow dish. Pull the chicken out of the brine one piece at a time, let the excess drip off, and press firmly into the flour mixture until every surface is fully coated. Set on a wire rack and rest for 10 minutes before frying so the coating bonds properly to the chicken.

4. Fry the Chicken

Pour enough neutral oil into a heavy pot to come about 2 inches up the sides and heat to 325°F (160°C). Fry the chicken in batches for 6 to 8 minutes per side until deep golden brown and the internal temperature reads 165°F (74°C). Transfer to a wire rack to drain. Before the last batch comes out, carefully scoop out half a cup of the hot oil and set it aside for the glaze.

5. Make the Glaze

Whisk the cayenne, brown sugar, and smoked paprika into the reserved hot oil until smooth and glossy. The oil needs to be hot so the sugar dissolves and the spices bloom into that thick, vibrant paste. Adjust the cayenne to your heat preference.

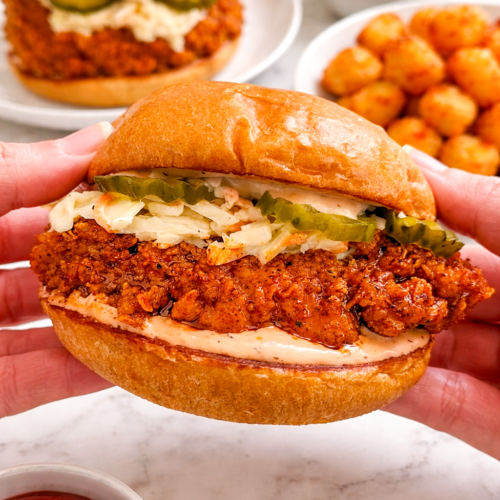
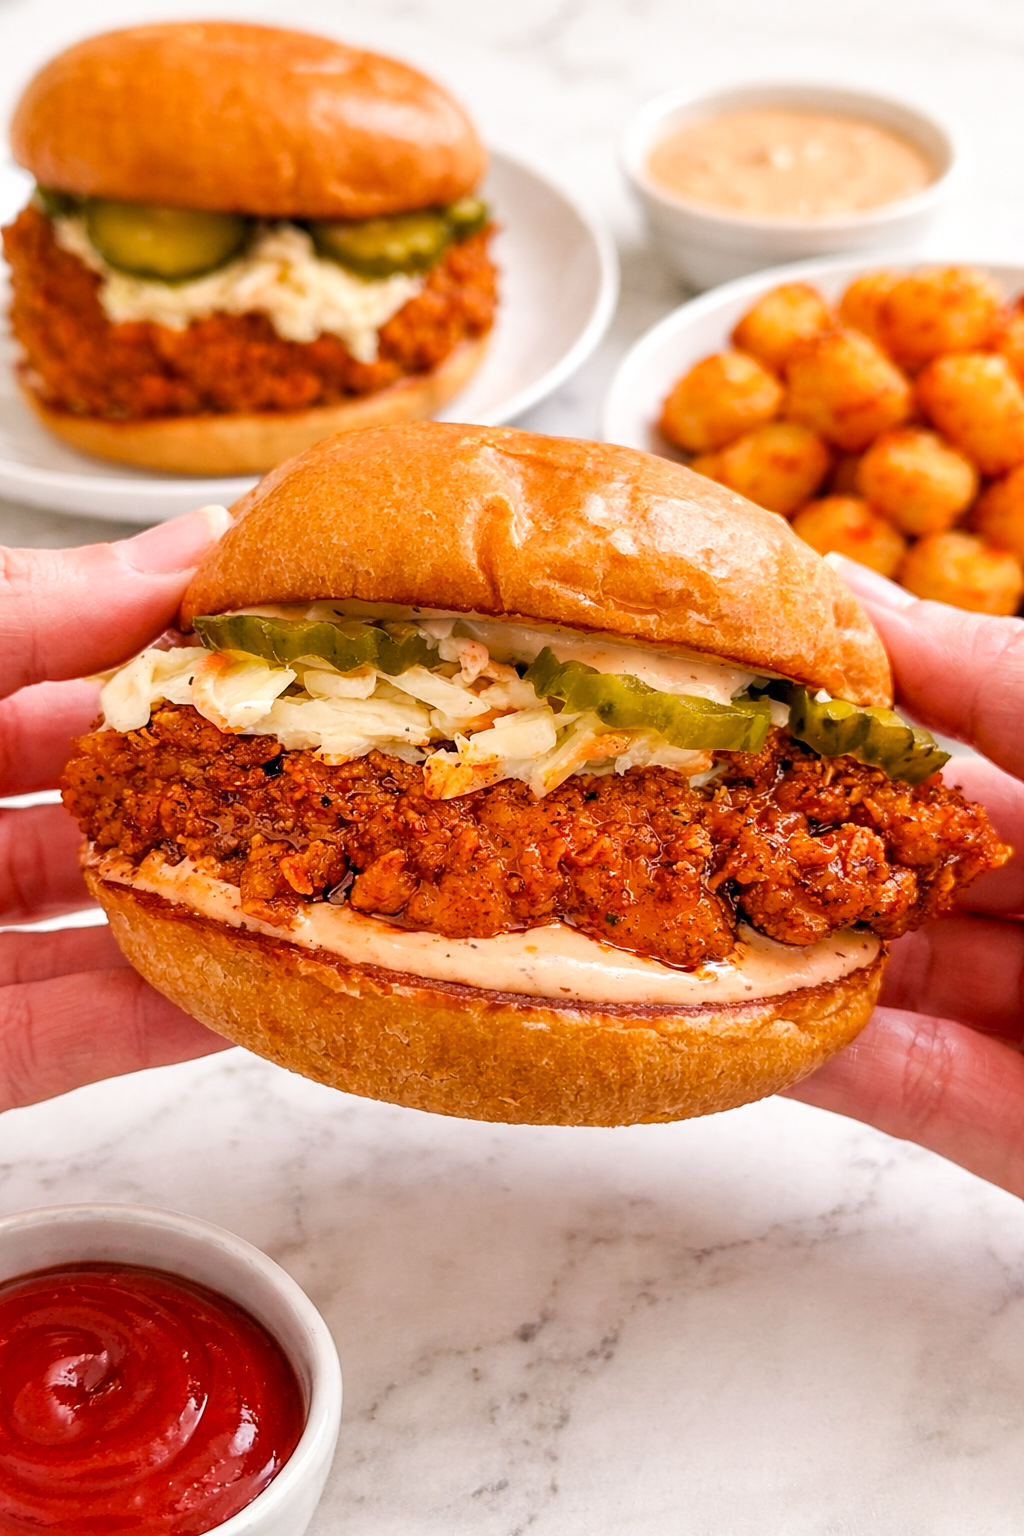
6. Glaze and Assemble

Brush the glaze generously over both sides of each piece of hot chicken. Toast the buns in a buttered pan cut-side down until golden. Spread mayonnaise on both halves, stack the glazed chicken on the bottom bun, pile on a handful of slaw, lay the pickles on top, and serve immediately.


Tips

  • Keep a thermometer in the oil the entire time and bring it back to 325°F (160°C) between batches. Cold chicken drops the temperature fast and frying in oil that is too cool gives you a greasy, soft crust rather than a crispy one.

  • Always rest the fried chicken on a wire rack, not paper towels. Paper towels trap steam underneath the crust and soften it within minutes. A wire rack keeps air circulating so the bottom stays just as crispy as the top.

  • Use chicken thighs over breasts. The higher fat content keeps them moist and forgiving through the fry and they are much harder to overcook than leaner breast meat.

  • Letting the dredged chicken rest for 10 minutes before frying is worth doing. The coating hydrates and bonds to the chicken during that time so it stays intact in the oil rather than sliding off in patches.

Variations and Substitutes

  • If you do not have buttermilk, add one tablespoon of white vinegar or lemon juice to one cup of regular milk and let it sit for five minutes until slightly thickened. It works almost identically to buttermilk for tenderizing the chicken and helping the coating stick.

  • To dial back the heat, reduce the cayenne in the glaze to one teaspoon and increase the smoked paprika by the same amount. You still get that deep red color and smoky sweetness without the full burn, which works well if you are cooking for mixed spice tolerances.

  • For an air fryer version, spray the dredged chicken well with oil and air fry at 375°F (190°C) for 18 to 20 minutes, flipping halfway. For the glaze, melt two tablespoons of butter and whisk in the spices in place of the hot frying oil. It is less crispy than the deep-fried version but still really good.

Storage and Reheating

Refrigerating

Store the glazed chicken separately from the buns, slaw, and pickles in an airtight container in the fridge for up to 3 days.

Freezing

Freeze the cooked unglazed chicken pieces individually wrapped in plastic wrap inside a freezer bag for up to 2 months, then glaze fresh after reheating.

Reheating

  • Oven: Place the chicken on a wire rack over a baking sheet and reheat at 375°F (190°C) for 10 to 12 minutes until heated through and crisped back up.

Crispy Nashville Hot Chicken Sandwiches

Juicy buttermilk fried chicken thighs coated in a thick seasoned crust and drenched in a glossy cayenne and brown sugar glaze, loaded onto a toasted brioche bun with cool creamy slaw and dill pickles.
Prep Time 15 minutes
Cook Time 20 minutes
Brining Time 2 hours
Total Time 35 minutes
Course Main Course
Servings 4

Ingredients
  

  • 4 boneless skinless chicken thighs
  • 1 cup buttermilk
  • 1 tsp salt
  • 1/2 tsp black pepper
  • 2 cups all-purpose flour
  • 1 tsp garlic powder
  • 1 tsp paprika
  • 1 tsp salt
  • 1/2 cup hot frying oil reserved from cooking
  • 2 tbsp cayenne pepper reduce to 1 tsp for mild
  • 1 tbsp light brown sugar
  • 1 tsp smoked paprika
  • 3 cups green cabbage thinly shredded
  • 1 large carrot grated
  • 3 tbsp mayonnaise
  • 1 tbsp apple cider vinegar
  • 1 tsp white sugar
  • 4 brioche or potato buns
  • dill pickle slices
  • mayonnaise
  • neutral oil for frying

Instructions
 

  • Whisk the buttermilk, salt, and pepper together, submerge the chicken thighs completely, cover, and refrigerate for at least 2 hours or overnight.
  • Toss the shredded cabbage and grated carrot together, whisk the mayo, vinegar, sugar, salt, and pepper, pour over the vegetables, toss to coat, and refrigerate until needed.
  • Whisk the flour, garlic powder, paprika, and salt together in a shallow dish. Remove the chicken from the brine, let the excess drip off, and press firmly into the flour until fully coated. Rest on a wire rack for 10 minutes.
  • Heat 2 inches of neutral oil to 325°F (160°C) and fry the chicken in batches for 6 to 8 minutes per side until deep golden brown and the internal temperature reaches 165°F (74°C). Transfer to a wire rack and reserve half a cup of the hot oil.
  • Whisk the cayenne, brown sugar, and smoked paprika into the reserved hot oil until a smooth glossy glaze forms.
  • Brush the glaze generously over both sides of the hot chicken.
  • Toast the buns in a buttered pan until golden, spread mayo on both halves, stack the glazed chicken, a handful of slaw, and dill pickles, and serve immediately.

Notes

  • Keep a thermometer in the oil and bring it back to 325°F (160°C) between batches. Frying in cool oil gives you a greasy, soft crust rather than a crispy one.
  • Rest the dredged chicken on a wire rack for 10 minutes before frying so the coating bonds properly and stays intact in the oil.
  • Always drain fried chicken on a wire rack, not paper towels. Paper towels trap steam underneath and soften the crust within minutes.
  • Use chicken thighs over breasts. They have more fat running through the meat which keeps them juicy and forgiving, and they are much harder to overcook.

Hi, I'm Katelyn

Welcome to Kaleyan.com! This is my own little blog where I share all my favourite home recipes and cooking tips with you all. 

Latest Recipes