No-Bake Oreo Cream Cheese Protein Balls

These Oreo cream cheese protein balls pack over 10 grams of protein each and taste so much like cookies and cream cheesecake that you will genuinely forget they are healthy. They take under 15 minutes to put together, need zero cooking, and just need an hour in the fridge to firm up before eating.

No-Bake Oreo Cream Cheese Protein Balls

Why You'll Love This Recipe

I started making these when I wanted a high protein snack that actually tasted yummy and sweet. The cream cheese pulls everything into this thick, rich dough that tastes exactly like cheesecake filling, and with 10 grams of protein per ball and no baking involved, they are honestly one of the easiest things you can make when you want something sweet after the gym.

Ingredients

Protein Balls

  • 15 to 20 Oreo cookies, crushed to fine crumbs (cream filling included)
  • 8 oz (227g) cream cheese, softened to room temperature
  • 1 cup (about 30g) vanilla or chocolate protein powder
  • 2 to 3 tbsp milk
  • 1 tsp vanilla extract
  • 1 pinch of salt

Instructions

1. Crush the Oreos

Seal the Oreos inside a zip-top bag and crush them with a rolling pin until you have fine crumbs with just a few small uneven bits scattered through for texture. A food processor works just as well and gets it done faster if you have one. The important thing is making sure the cream filling breaks down fully into the crumb rather than staying in separate clumps, because that filling is what sweetens the base and helps bind the whole dough together.

2. Soften the Cream Cheese

Pull the cream cheese out of the fridge at least 30 to 45 minutes before you start. Properly softened cream cheese blends into the Oreo crumbs almost instantly and gives you a completely smooth, lump-free base to work with. If you try to use it cold it will not incorporate no matter how hard you stir and you will end up with white lumps running through the finished balls. If you forgot to take it out early, microwave it in 10-second bursts until it is soft and easily spreadable.

3. Mix the Base

Add the softened cream cheese and Oreo crumbs to a medium bowl and stir together until you have a completely uniform dark paste with no white streaks remaining. Take your time here because this is the foundation of the whole recipe and getting it fully combined before adding anything else means everything that goes in after blends in evenly. It should look thick, glossy, and a little like brownie batter at this point.

4. Add the Protein Powder

Add the protein powder in two or three additions, stirring well after each one. This is the step most people rush and it is exactly why so many protein ball recipes end up gritty and unpleasant. Adding it gradually lets it absorb properly into the cream cheese base so it disappears into the dough rather than sitting on top of it. Once all the powder is incorporated, stir through the vanilla extract and pinch of salt.

5. Adjust the Consistency

Press the dough between your fingers. It should hold together cleanly and feel like soft play dough. If it feels dry or crumbly, add milk one tablespoon at a time and stir until it comes together. If it feels too wet and sticky to roll cleanly, work in a small extra scoop of protein powder. Getting the texture right before you start rolling makes the whole process so much easier and gives you neater, smoother balls throughout.

6. Roll the Balls

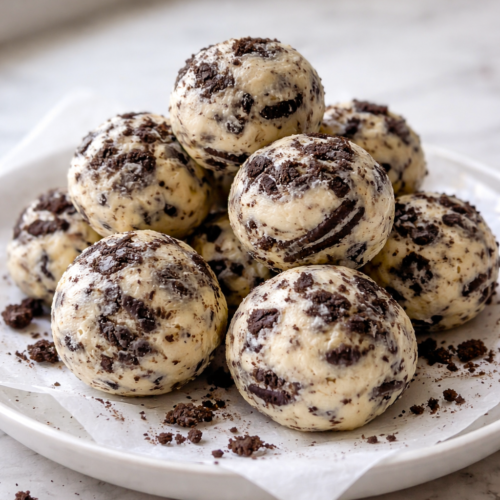
Scoop roughly one tablespoon of dough per ball and roll between your palms with light, consistent pressure until smooth and round. Place each one on a parchment-lined tray as you go. If the dough starts warming up and getting sticky halfway through the batch, pop the bowl in the fridge for 10 minutes and then carry on. Slightly chilled dough rolls so much more cleanly.
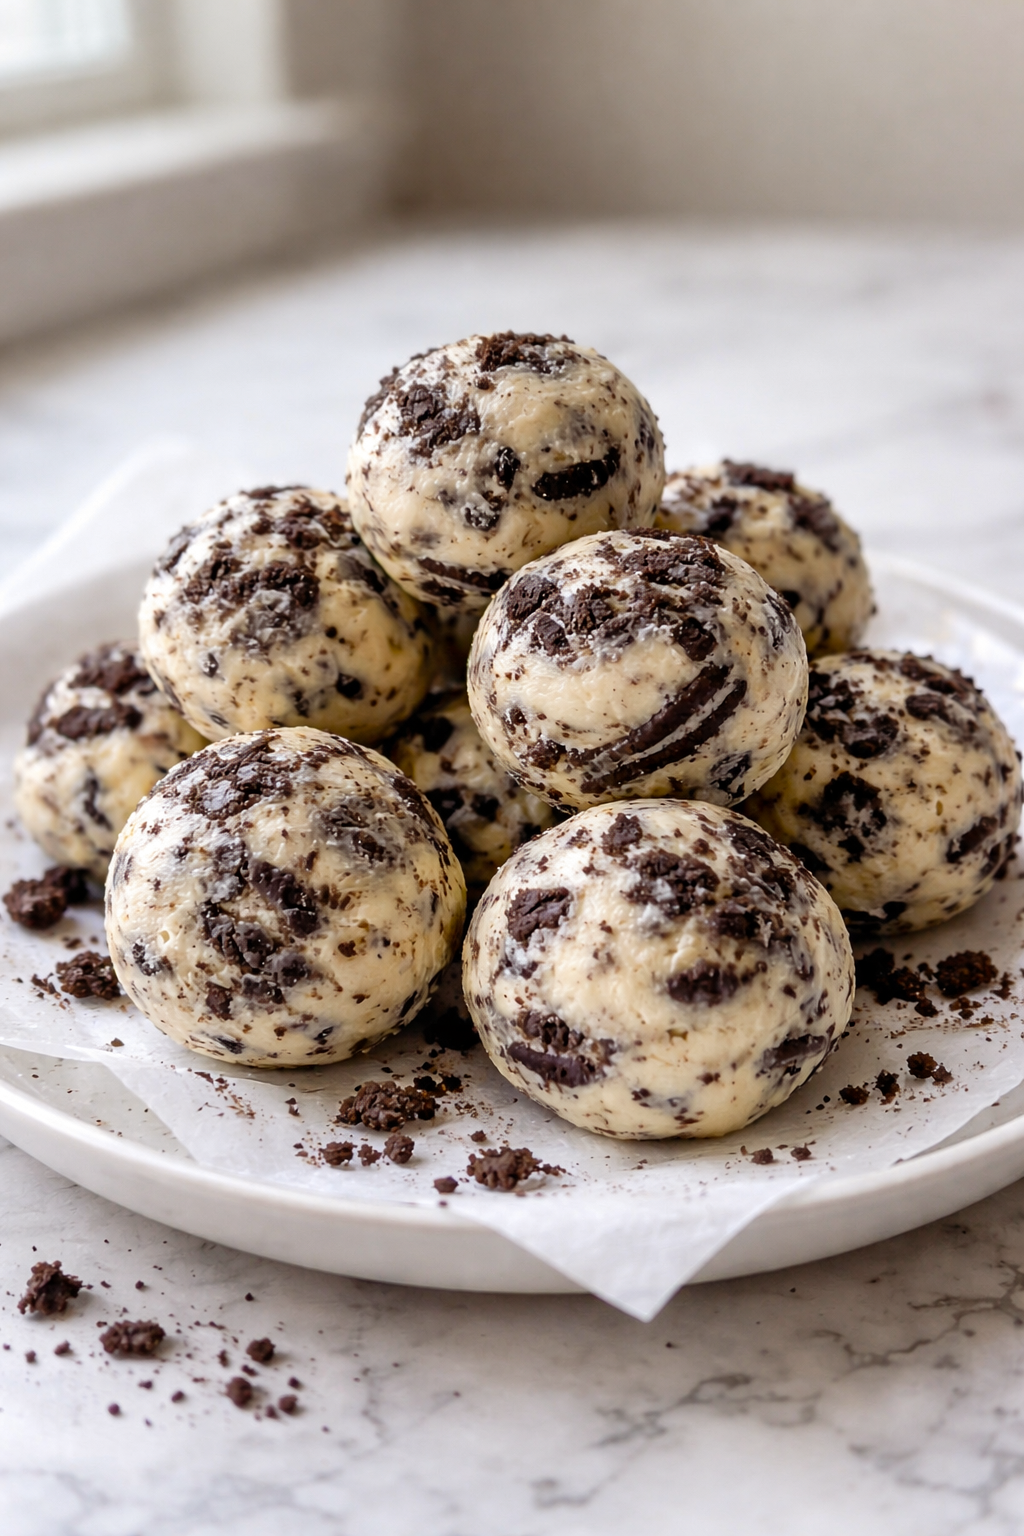
7. Coat and Chill

If you want the Oreo coating, roll each ball through a small bowl of reserved Oreo crumbs right after rolling and before chilling. Transfer the tray to the fridge and chill for at least one hour until the balls are completely firm. If you are short on time, 30 minutes in the freezer will also do the job.


Tips

  • Protein powder type changes the texture more than you would expect. Whey protein blends into the cream cheese base smoothly and gives you the creamiest, most cohesive dough. Plant-based protein powders tend to be slightly grittier and can absorb more moisture, so if you are using one, add that splash of milk early and expect to adjust as you go.

  • Room temperature cream cheese is non-negotiable for a smooth dough. If the cream cheese is even slightly cold it will not fully incorporate with the crumbs and you will see small white lumps throughout the balls. Fully softened cream cheese blends into a seamless, glossy base that gives the balls their clean cheesecake-like texture.

  • Do not skip the salt. A small pinch in a sweet no-bake recipe like this sharpens the chocolate flavor from the Oreos and stops the whole thing tasting one-dimensional. It is easy to overlook but makes a real difference in the finished flavor.

  • Uniform sizing helps with even chilling and a neater result. Using a small cookie scoop or a tablespoon measure to portion the dough before rolling means every ball is approximately the same size, which means they all firm up at the same rate and look consistent on a plate.

Variations and Substitutes

  • For a dairy-free version, swap the cream cheese for a good quality vegan cream cheese and use any plant-based milk to adjust the consistency. Plant-based protein powder works well here too. The flavor is slightly less tangy than the original but still rich and satisfying, and the texture holds up just as well after chilling.

  • Golden Oreos make a great vanilla version of these. The dough comes out lighter in color and has a sweeter, less chocolatey flavor that works really well with vanilla protein powder. It is a great option if you want something a little different or are making these for people who prefer vanilla over chocolate.

  • Two tablespoons of peanut butter stirred into the dough alongside the cream cheese adds a nutty richness that plays really well against the chocolate Oreo flavor. It also makes the dough slightly softer, so you may need a touch less milk to compensate.

Storage and Reheating

Refrigerating

Store in an airtight container in the refrigerator for up to 5 days.

Freezing

Freeze in a single layer on a tray until solid, then transfer to an airtight freezer bag or container for up to 2 months. Let them sit at room temperature for 20 to 30 minutes before eating.

No-Bake Oreo Cream Cheese Protein Balls

Soft, chewy no-bake bites packed with crushed Oreos and cream cheese that taste exactly like cookies and cream cheesecake with over 5 grams of protein in every single ball. The dough comes together in minutes, chills into a perfectly firm texture, and keeps well in the fridge all week long.
Prep Time 15 minutes
Refrigerating Time 1 hour
Total Time 1 hour 15 minutes
Course Snack
Servings 20 Balls

Ingredients
  

  • 15 to 20 Oreo cookies crushed to fine crumbs (cream filling included, reserve some for rolling if desired)
  • 8 oz 227g cream cheese, softened to room temperature
  • 1 cup 30g vanilla or chocolate protein powder
  • 2 to 3 tbsp milk
  • 1 tsp vanilla extract
  • 1 pinch of salt

Instructions
 

  • Seal the Oreos in a zip-top bag and crush with a rolling pin until fine crumbs form with a few small uneven bits throughout.
  • Leave the cream cheese at room temperature for 30 to 45 minutes until fully soft and easily spreadable.
  • Combine the softened cream cheese and Oreo crumbs in a medium bowl and stir until completely smooth and uniform with no white streaks remaining.
  • Add the protein powder in two or three additions, stirring well after each, then mix in the vanilla extract and salt.
  • Check the consistency and add milk one tablespoon at a time if the dough feels dry, or a small extra scoop of protein powder if too wet, until it holds together and rolls cleanly.
  • Scoop roughly one tablespoon of dough per ball and roll between your palms until smooth and round. Place on a parchment-lined tray.
  • Roll in reserved Oreo crumbs if using, then refrigerate for at least one hour until completely firm before serving.

Notes

  • Whey protein gives the smoothest result. Plant-based powders absorb more moisture so add your milk early and adjust as you go.
  • Fully softened cream cheese is essential. Cold cream cheese will not blend properly and you will end up with white lumps throughout the finished balls.
  • Do not skip the salt. It sharpens the chocolate flavor from the Oreos and stops the whole thing tasting flat.
  • Roll the balls in reserved Oreo crumbs right after shaping and before chilling so the coating sticks properly to the surface.

Hi, I'm Katelyn

Welcome to Kaleyan.com! This is my own little blog where I share all my favourite home recipes and cooking tips with you all. 

Latest Recipes